Looking to add a touch of sophistication and organization to your lawn? Look no further than installing lawn edging! In this step-by-step guide, we’ll show you how to choose the right edging material, prepare the ground, and install the borders like a pro. We’ll even give you tips on how to keep your edging looking pristine. Get ready to transform your outdoor space with this easy and stylish DIY project!
Choosing the Right Lawn Edging Material
When choosing the right lawn edging material, it is important to consider factors such as durability and aesthetic appeal. One option to consider is metal edging. Metal edging such as aluminium and steel lawn edging is known for its durability and ability to withstand harsh weather conditions. It provides a sleek and modern look to your lawn, adding a touch of sophistication. Another option is plastic edging. Plastic edging is affordable and easy to install.
It comes in a variety of colors and styles, allowing you to choose one that best suits your aesthetic preferences. Concrete edging is another popular choice. It offers a more permanent solution and can be customized to fit any shape or design. Overall, selecting the right lawn edging material is crucial in achieving a well-maintained and visually appealing outdoor space.
Preparing the Ground for Installation
Before you start, make sure to clear the area of any debris or vegetation. This is an important step in preparing the ground for the installation of lawn edging. By removing any obstacles, you create a clean and smooth surface for the edging to be placed. Begin by picking up any fallen branches, leaves, or rocks that may be scattered across the area.
Next, use a rake or broom to sweep away any dirt or dust. It is also essential to remove any weeds or grass that may be growing along the edges. This can be done by using a weed trimmer or a garden spade to cut them down and remove the roots. Taking the time to properly clear the area will ensure a successful installation of your lawn edging.
Installing the Lawn Edging Borders
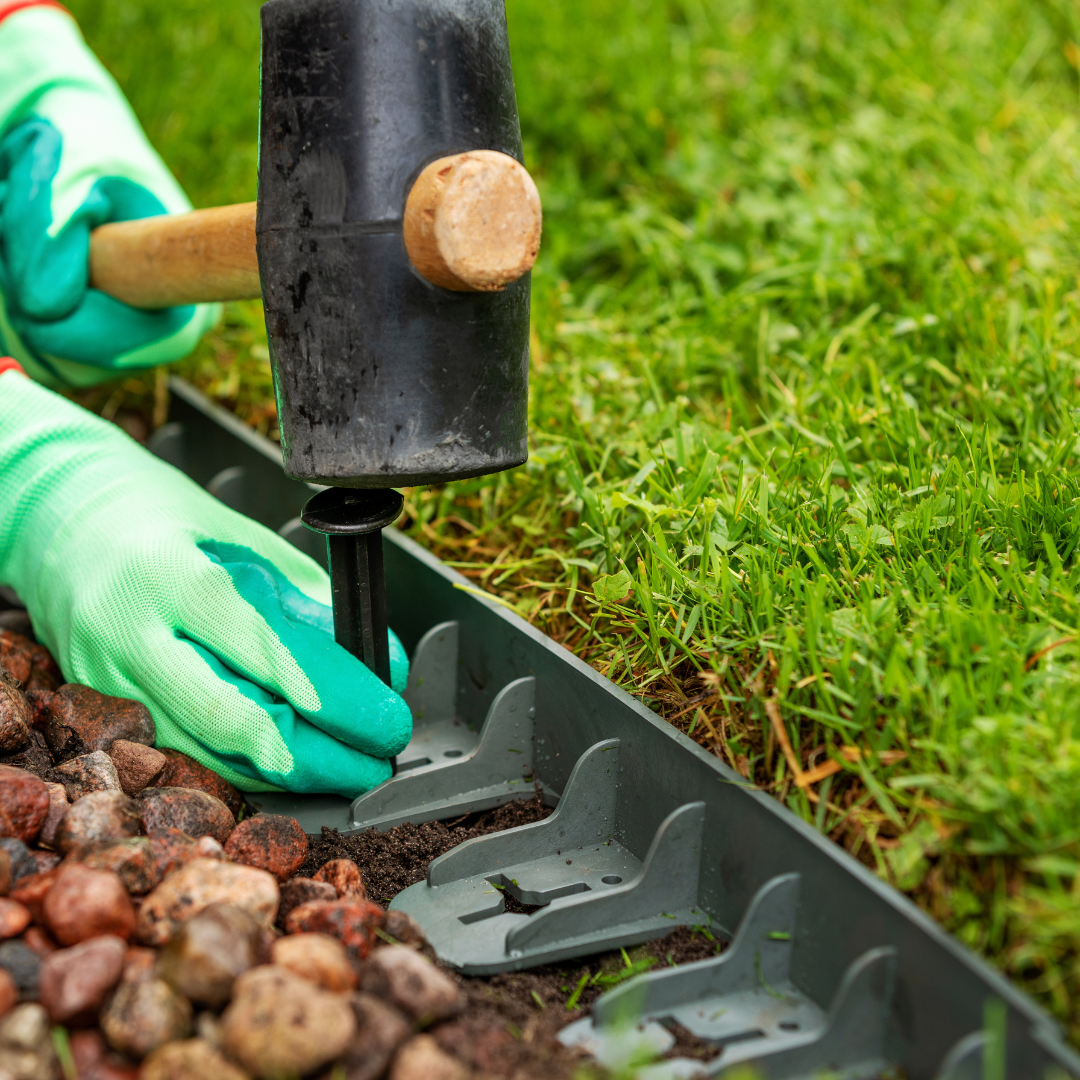
To begin, you’ll want to position the lawn edging borders along the desired area. This step is crucial as it establishes the boundary for your lawn. Take care to ensure that the edges are aligned properly and form a straight line. Once they are in position, you can secure them by pushing them into the ground.
It’s important to make sure they are firmly in place to prevent any movement or shifting. After securing the borders, you can start backfilling the area with soil or mulch. This will help to stabilize the borders and create a clean, finished look. Finally, use a level to check that the borders are even and adjust if necessary. With the lawn edging borders installed, your lawn will have a defined and polished appearance. That said, if you are unsure about the installation process or need additional support, consider seeking help from professionals who specialise in steel garden edging. These experts can ensure precise installation and long-lasting results.
Securing the Edging in Place
Once you have positioned the lawn edging borders, make sure they are firmly secured in place to prevent any movement or shifting. To do this, you can use landscape stakes or spikes. Start by hammering the stakes into the ground adjacent to the edging, making sure they are evenly spaced. Then, attach the edging to the stakes using screws or nails.
Make sure to drive them in securely to ensure the edging stays in place. Another option is to use heavy-duty adhesive or landscape adhesive to bond the edging to the ground. Apply the adhesive along the bottom edge of the edging and press it firmly into the ground. This will provide additional stability and prevent any potential shifting or movement.
Maintaining and Enhancing the Edging Appearance
Keep in mind that regular cleaning and periodic touch-ups will help keep your lawn edging looking its best. Over time, dirt and debris can accumulate on the edging, causing it to lose its luster. To clean the edging, use a soft brush or cloth and gently scrub away any dirt or stains. Avoid using harsh chemicals or abrasive materials that could damage the edging.
In addition to cleaning, periodic touch-ups can help maintain the appearance of the edging. If you notice any chips or scratches, use touch-up paint or a matching color marker to cover them up. This will not only improve the overall look of the edging but also help protect it from further damage. By following these simple maintenance steps, you can ensure that your lawn edging continues to enhance the beauty of your outdoor space.
Frequently Asked Questions
Can Lawn Edging Be Installed in Curved or Irregularly Shaped Areas?
Lawn edging can indeed be installed in curved or irregularly shaped areas. It provides a neat and defined border to your lawn, regardless of the shape. Follow these steps for a successful installation.
How Long Does It Typically Take to Install Lawn Edging?
The time required for installing lawn edging varies depending on factors such as the size of the area, the type of edging material used, and the level of expertise of the person installing it.
Is It Necessary to Remove Existing Grass Before Installing Lawn Edging?
It is not necessary to remove existing grass before installing lawn edging. The edging can be installed directly on top of the grass, providing a neat border for your lawn.
Can Lawn Edging Be Easily Removed or Relocated if Needed?
Lawn edging can be easily removed or relocated if needed. It provides flexibility and allows for adjustments. This makes it convenient for changing landscape designs or making alterations to the lawn layout.
Can Lawn Edging Be Painted or Stained to Match the Surrounding Landscape?
Lawn edging can indeed be painted or stained in order to match the surrounding landscape. This allows for customization and a cohesive look.
Conclusion
Installing lawn edging is a simple and effective way to enhance the appearance of your outdoor space. By following this step-by-step guide, you can easily achieve a well-defined and neat border for your lawn. From choosing the right material to securing the edging in place, this process can be completed with ease. With proper maintenance, your lawn edging will continue to enhance the look of your yard for years to come.


